
How to Install Windows: A Complete Step-by-Step Guide (2025 Updated)
Installing Windows on a laptop or desktop may look complicated, but in reality it’s quite simple when you follow the correct steps. Whether you’re installing Windows for the first time, upgrading from an older version, or doing a fresh clean install, this guide will walk you through the entire process in the easiest way possible. lets start the windows installation .
In this article, you will learn:
- What you need before installing Windows
- How to create a bootable USB
- How to install Windows step by step
- What to do after installation
Let’s get started!
1. Requirements Before Installing Windows
Before you begin the installation process, make sure you have the following:
- ✔ A Bootable USB Drive : A USB drive with at least 8GB storage is required.
- ✔ Windows ISO File : You can download the official ISO from Microsoft’s website.
- ✔ A working PC or Laptop : Make sure the system supports the version of Windows you want to install.
- ✔ Backup Your Important Data : A clean installation will erase your drive, so make sure to back up everything important.
2. Download Windows ISO File ( Click Here for download )
Microsoft provides the latest Windows ISO through their official site.
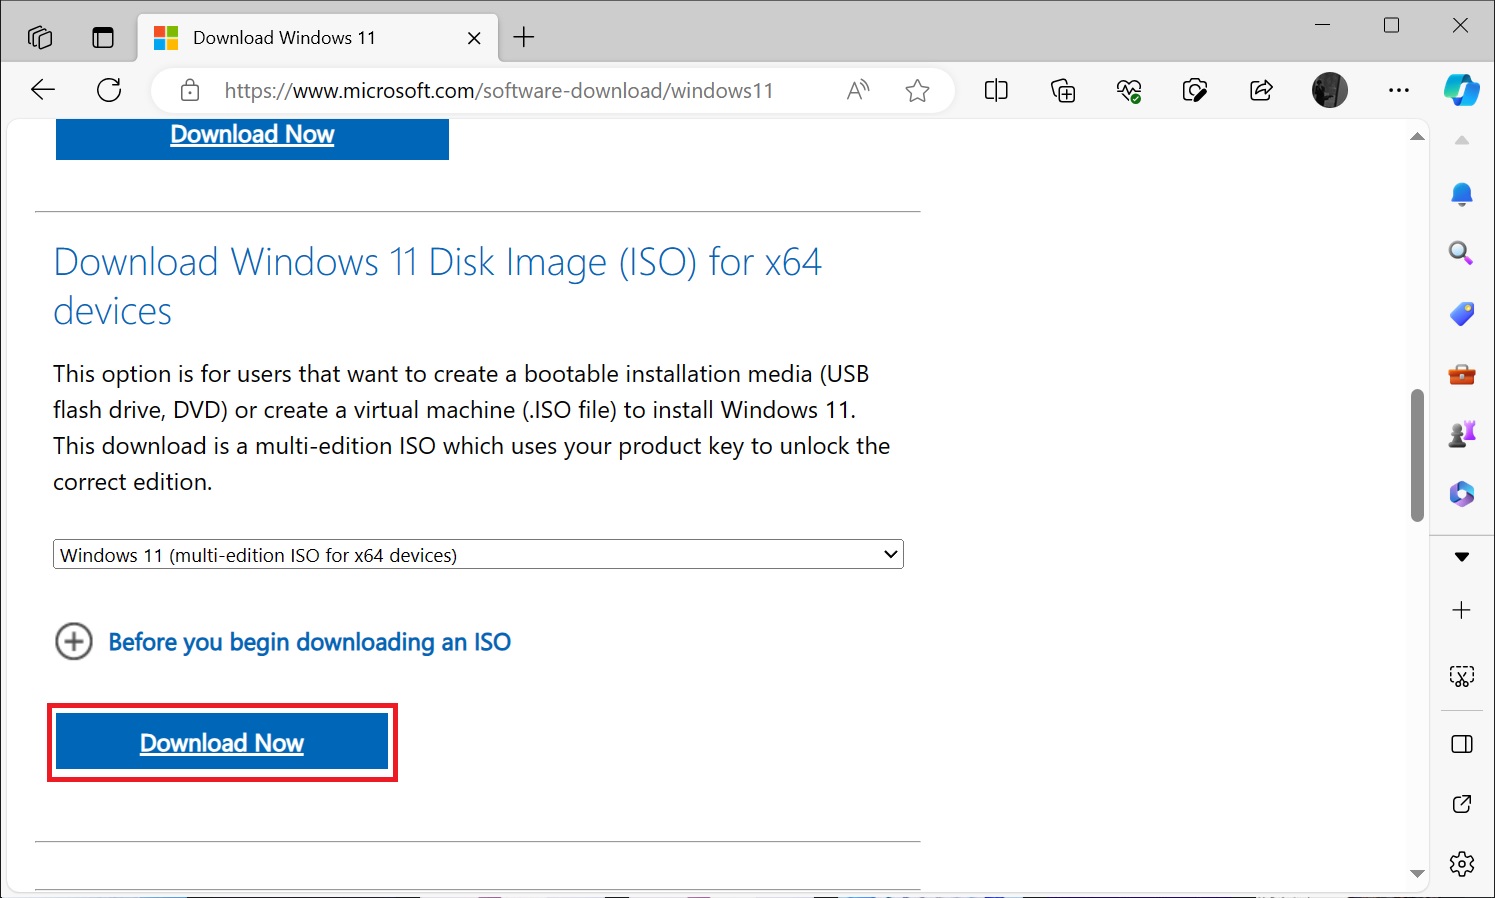
Steps:
- Go to Microsoft Download Center
- Choose your Windows version (Windows 10 / Windows 11)
- Select Download ISO
- Save the file on your PC
3. Create a Bootable USB (Very Important)
To install Windows, you need to write the ISO to your USB drive. The best tool for this is Rufus. ( Click Here to Download Rufus )
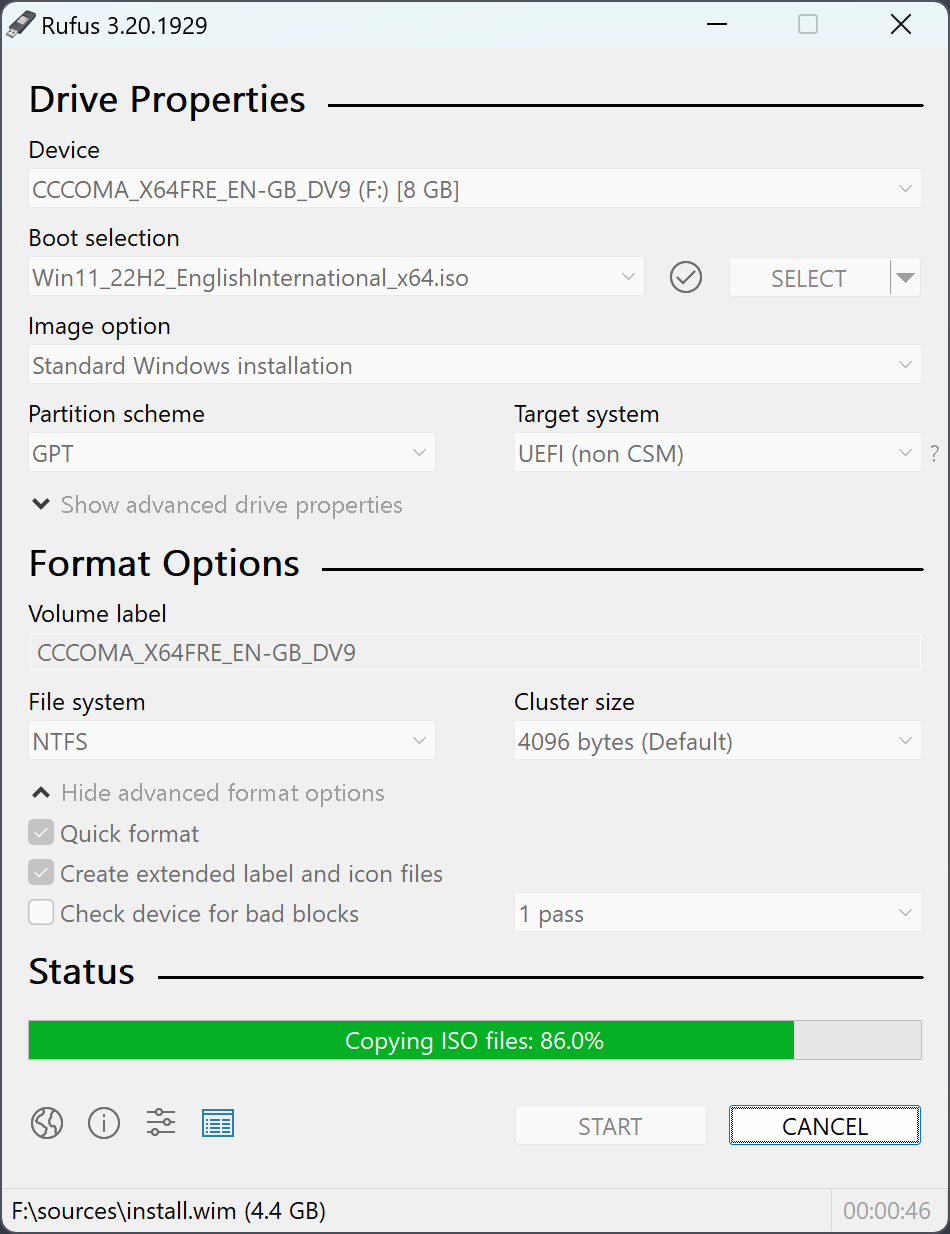
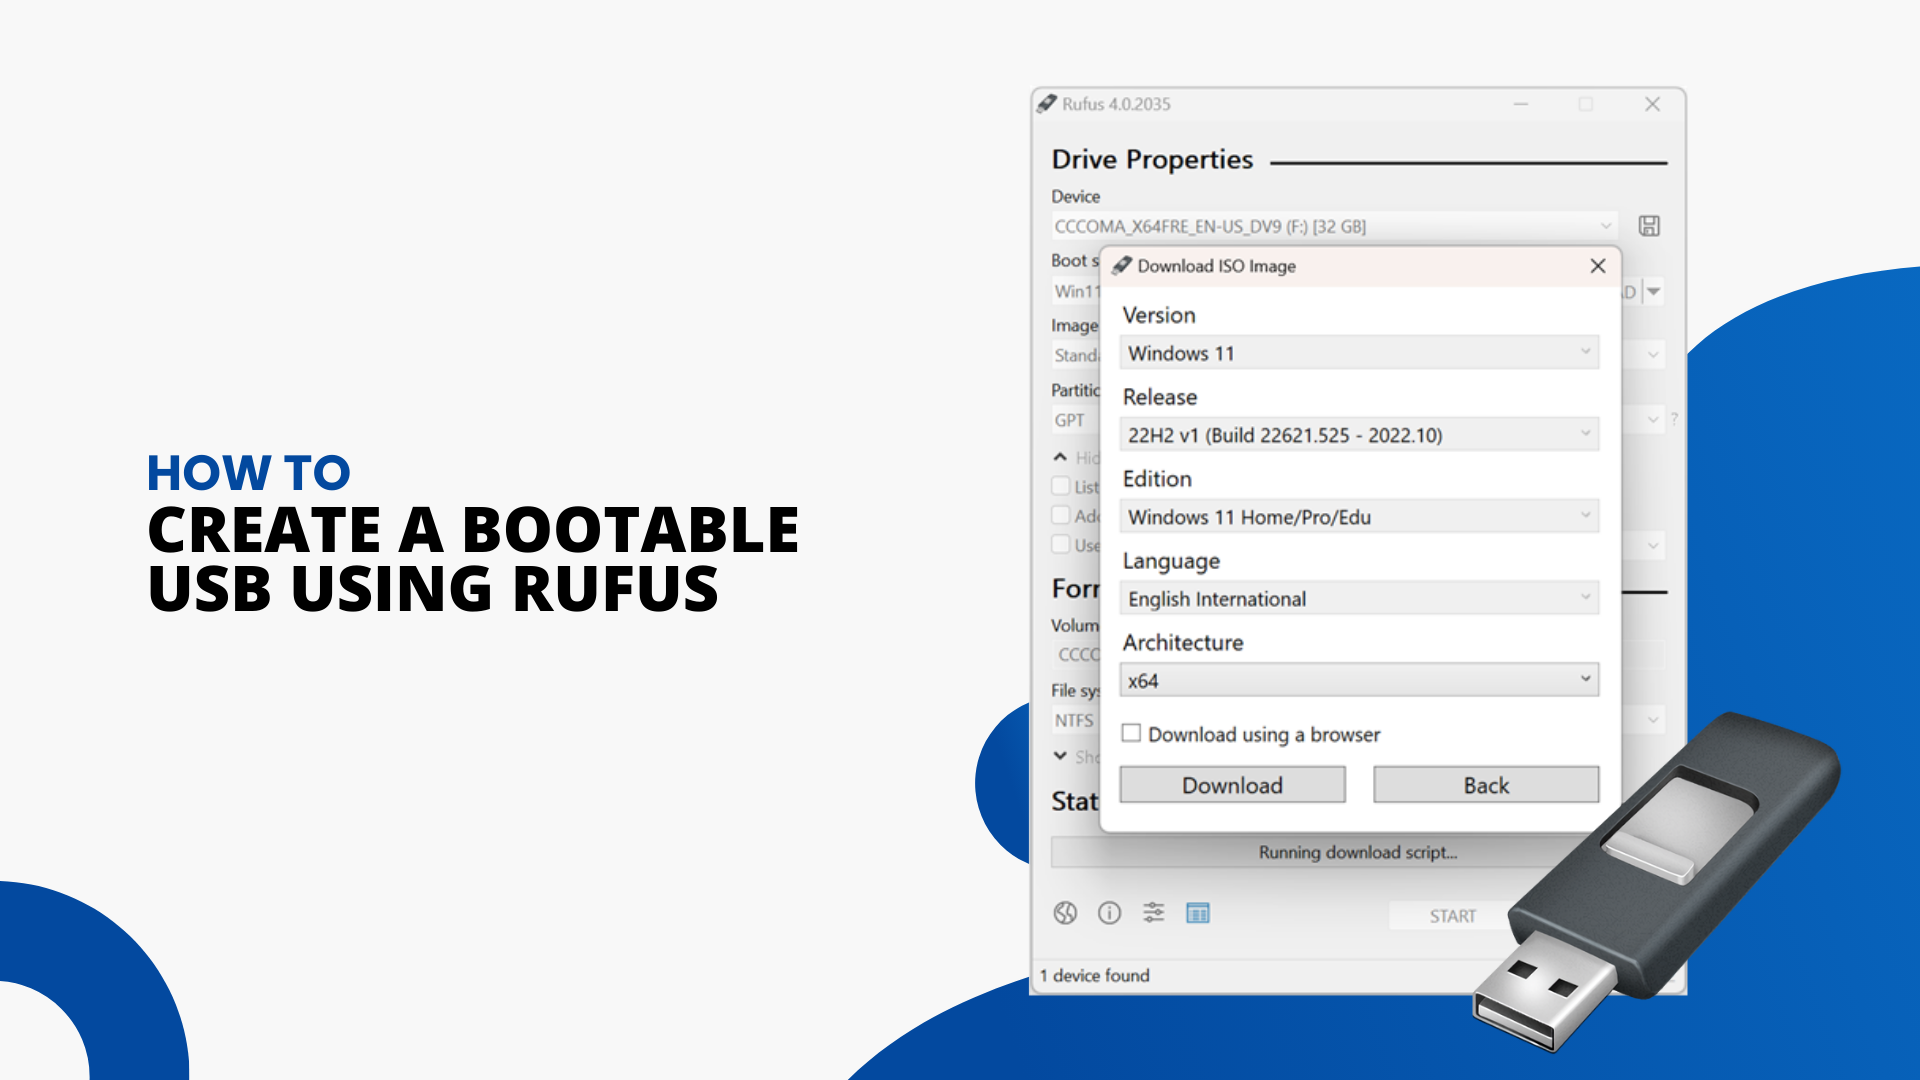

Steps to create a bootable USB using Rufus:
- Insert your USB drive
- Open Rufus
- Under Device, select your USB
- Under Boot Selection, choose the Windows ISO file
- Click Start
- Wait until the USB becomes bootable
Now your bootable USB is ready for installation.
4. Boot Your PC From the USB Drive
This step will start the installation setup.
How to open the Boot Menu:
Restart your PC and press one of the following keys (depends on brand): ( Click Here to Check Your BOOT Key )
| Brand | Boot Key |
|---|---|
| Dell | F12 |
| HP | F9 |
| Acer | F12 |
| Lenovo | F12 |
| Asus | Esc |
| MSI | F11 |


5. Start the Windows Installation
Once your system boots from USB, the installation screen will appear.

Follow these steps:
- Step 1: Choose Language → Click Next
- Step 2: Click Install Now
- Step 3: Select your Windows edition
- Step 4: Enter Product Key (or click I don’t have a product key)
- Step 5: Choose Custom: Install Windows Only
6. Format the Drive (For Clean Installation)
This step is very important if you want a fresh installation.
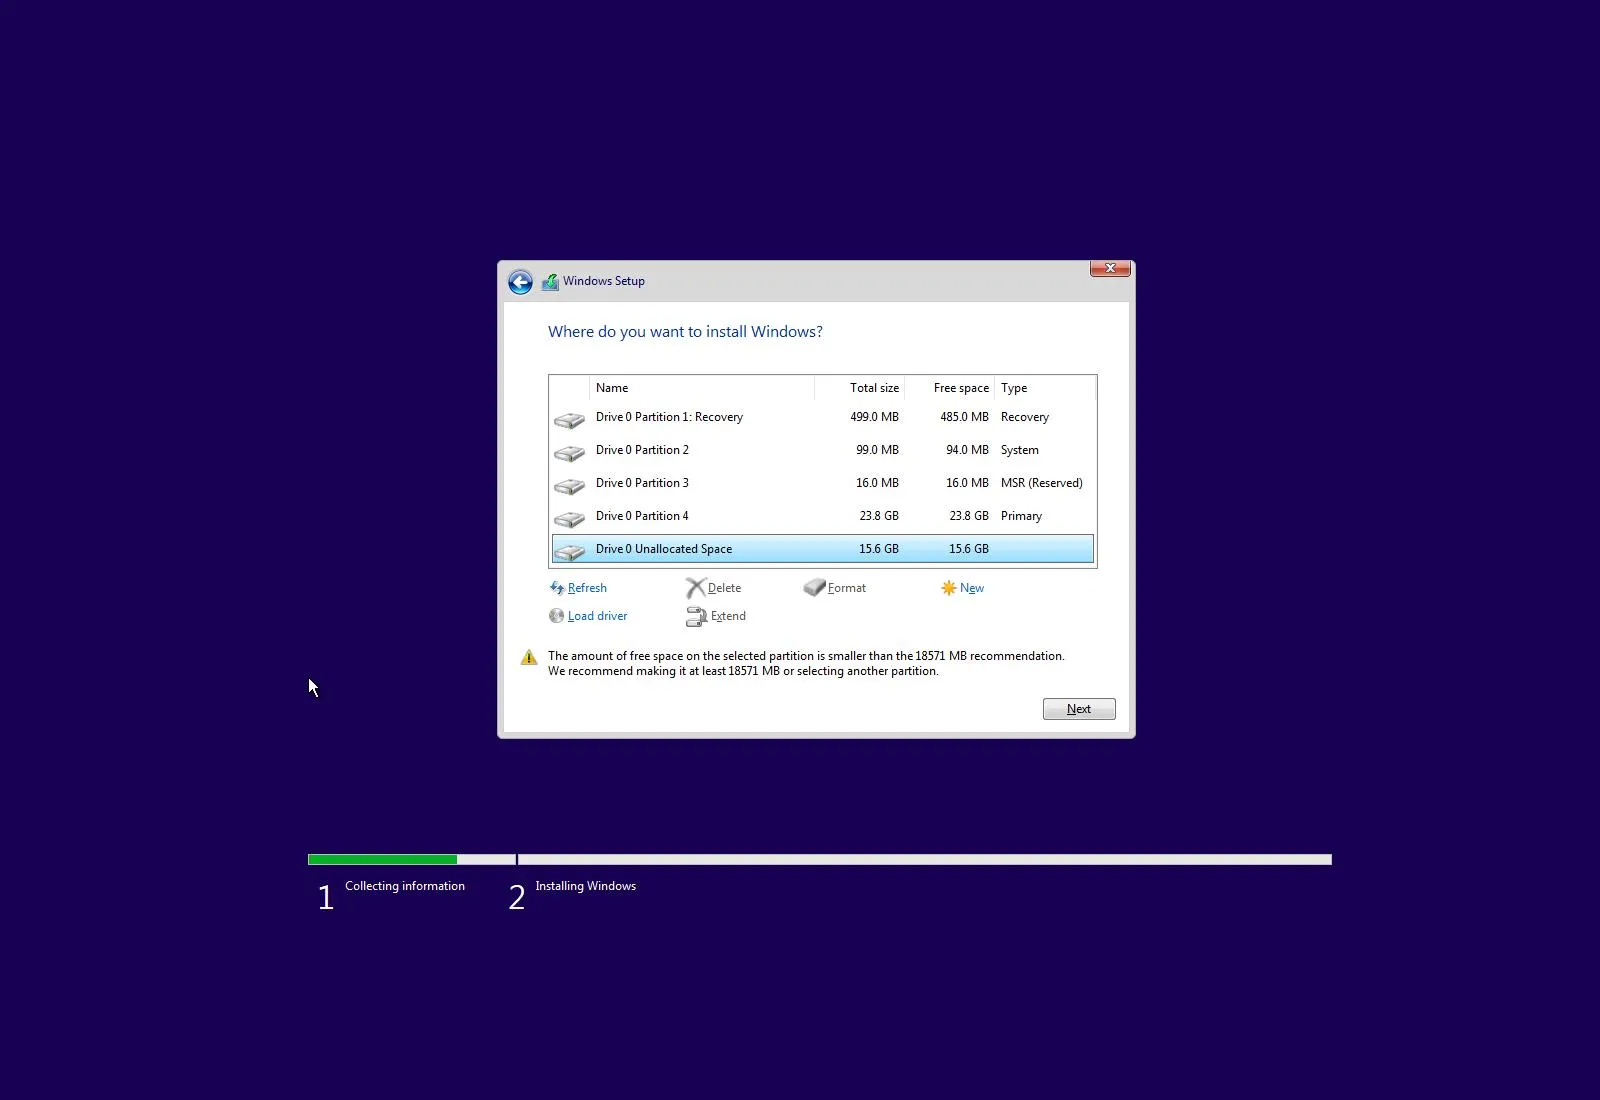
Steps:
- Select the drive where Windows was installed earlier
- Click Delete
- Select the Unallocated Space
- Click Next
Windows will now begin installing files.
7. Let Windows Install Automatically
This part takes 5–20 minutes depending on your system. During installation, your PC will restart several times.
Do not remove your USB until Windows asks you to.
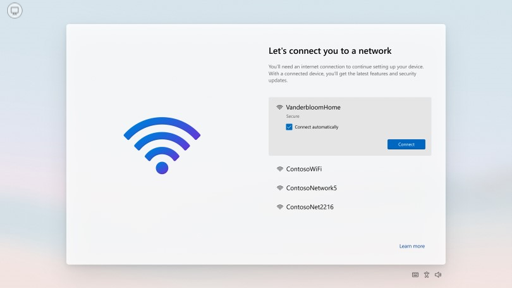
8. Complete the Windows Setup
After installation, Windows will ask for initial setup:
- Select Country
- Choose Keyboard Layout
- Connect to WiFi
- Sign in with Microsoft Account
- Create PIN
- Choose privacy settings
9. Install Drivers (Very Important)
After installation, make sure to install drivers for:
- Graphics
- WiFi / LAN
- Audio
- Chipset
- Touchpad
You can use:
✔ Windows Update
✔ DriverPack / Snappy Driver Installer
✔ Official Laptop Manufacturer Website
10. Final Steps After Installation
To finish everything properly, do these tasks:
- Activate Windows
- Install Antivirus (Windows Defender is good enough)
- Install browsers (Chrome, Edge, Brave)
- Update Windows to the latest version
- Install essential apps
Conclusion
Installing Windows or How to Install Windows or Windows Installation is simple if you follow the right steps. With a bootable USB, proper BIOS settings, and the correct installation flow, you can install Windows 10 or Windows 11 in less than 30 minutes. This guide covers everything—from creating a bootable USB to completing the initial setup—so even beginners can do it without any confusion.